Getting started
Claim an imported company account
Verify your company email before managing an imported employer profile.
For: Business account
Start here: Claim company
WisePick invitation → Claim account, or imported company profile → Claim account
Each section below names the page or dialog to use. Move to the next page only when the instructions say to.
Step-by-step instructions
Page / dialog · Steps 1–5
Claim company
Where to go: WisePick invitation → Claim account, or imported company profile → Claim account
- Step 1.
Open the claim link in your WisePick invitation, or open your imported company profile and choose Claim account.
- Step 2.
Check the company name and the masked email shown on the claim page.
- Step 3.
Choose a password and request the verification code.
- Step 4.
Ask the person who manages that company email to retrieve the six-digit code.
- Step 5.
On the Claim company page, enter the code to verify email ownership.
Relevant page screenshot
Example page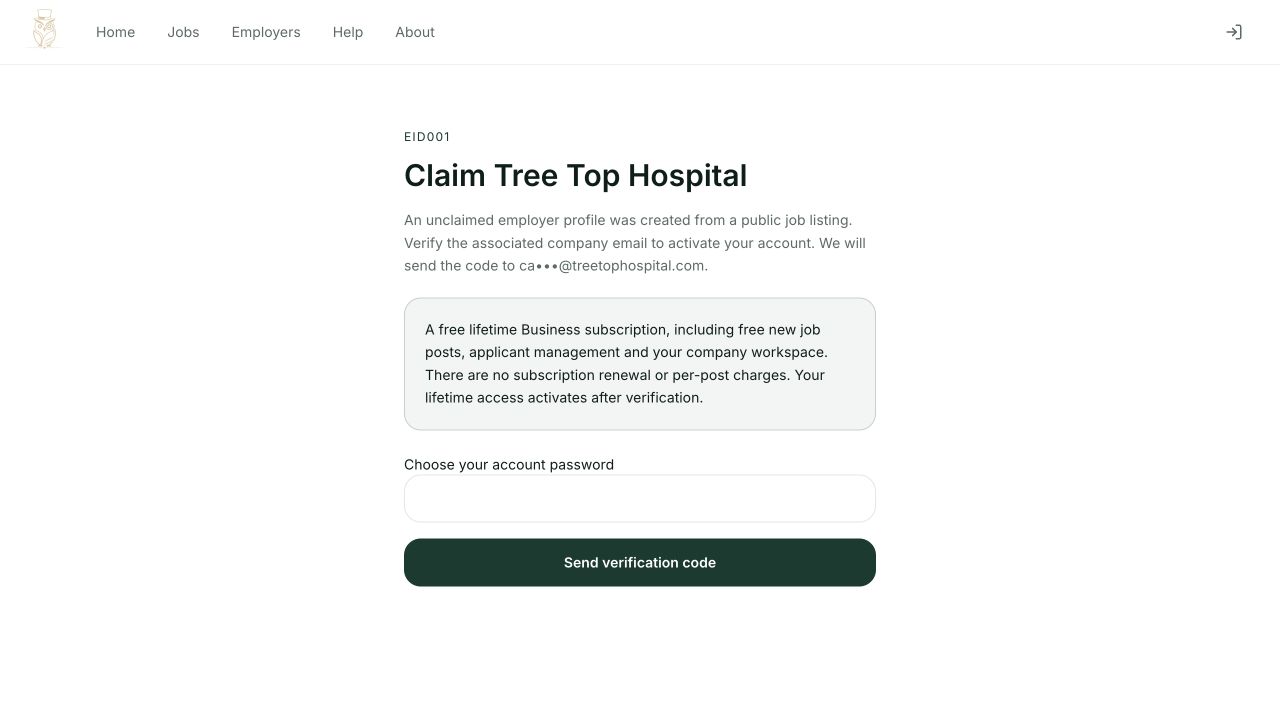
Claim company
Steps 1, 2, 3, 4, 5 in this section. Where to find it: WisePick invitation → Claim account, or imported company profile → Claim account. This is an example of this page, not an additional task. Use the written instructions for the exact controls and the current details in your account.
This screenshot illustrates the named page and steps above. Example names and values may differ from your account. Follow the written instructions, especially for payments.
Screenshot 1 of 1: Claim company
Page / dialog · Step 6
Business profile
Where to go: Business side menu → Business profile
Open Business profile →- Step 6.
After activation, open Business profile to review your company details and Job openings to manage the imported vacancies.
Good to know
A lifetime invitation includes free new posts. A management trial covers existing imported posts; new posts require a paid Business subscription. If the email is wrong or unavailable, contact support.