Contracts & team
Create staff users and assign permissions
Give colleagues their own sign-in details.
For: Business owner
Start here: Staff & permissions
Business side menu → Team → Staff & permissions
Each section below names the page or dialog to use. Move to the next page only when the instructions say to.
Step-by-step instructions
Page / dialog · Steps 1–6
Staff & permissions
Where to go: Business side menu → Team → Staff & permissions
Open Staff & permissions →- Step 1.
Open Staff & permissions from your business workspace.
- Step 2.
Choose the option to create a staff user.
- Step 3.
Enter their name, email, username and initial sign-in details.
- Step 4.
Assign the appropriate permission level.
- Step 5.
Save and share the sign-in information privately with that colleague.
- Step 6.
Review access when a person changes role or leaves the company.
Relevant page screenshot
Example page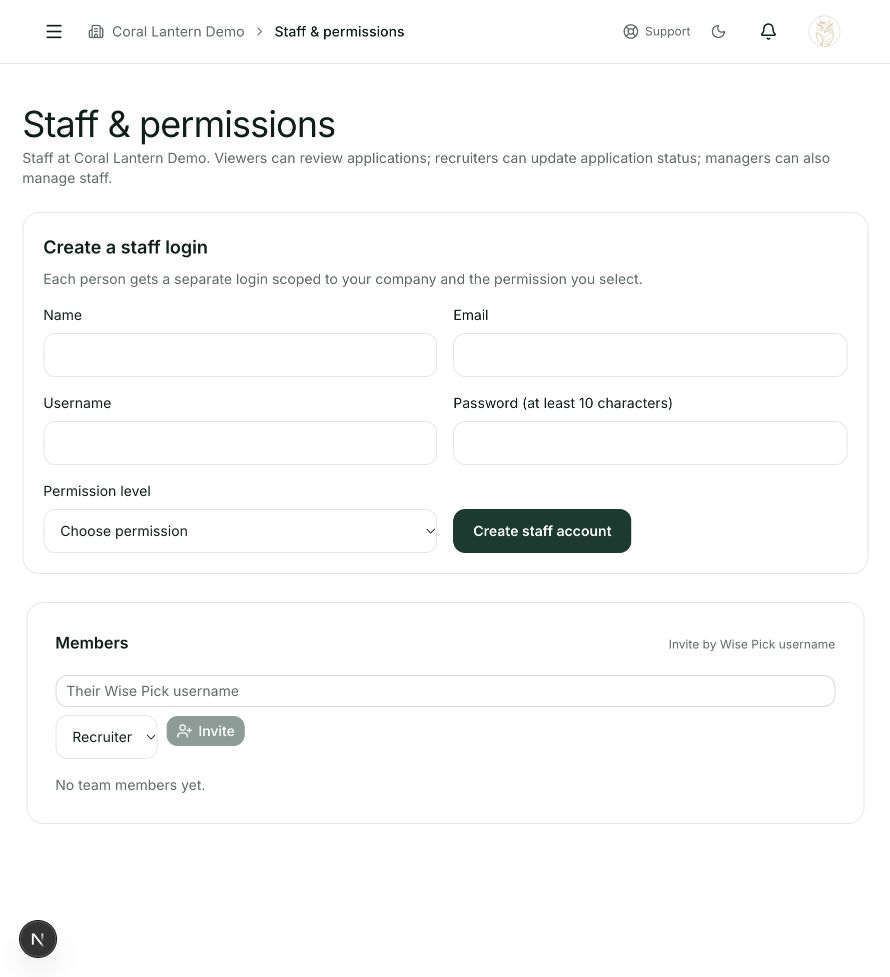
Staff & permissions
Steps 1, 2, 3, 4, 5, 6 in this section. Where to find it: Business side menu → Team → Staff & permissions. This is an example of this page, not an additional task. Use the written instructions for the exact controls and the current details in your account.
This screenshot illustrates the named page and steps above. Example names and values may differ from your account. Follow the written instructions, especially for payments.
Screenshot 1 of 1: Staff & permissions
Good to know
Give people only the access they need. Each staff member should use their own account.